Introduction
In this tutorial we will deploy and configure the Livepatch on-premise server using LXD as our cloud provider.
We will be using LXD, Juju and the Livepatch server machine charm/bundle.
For this how-to, you do not require any previous or advanced knowledge of LXD, Juju or Charmed Operators to proceed and deploy Livepatch on-premise.
If you’ve already deployed Livepatch before, and wish to keep your same configuration, we’ve rewritten our machine charm and the configuration has changed. Please see here for instructions on how to migrate.
JQ
JQ is a JSON processor, and we’ll use it within this tutorial to extract some values for later use. Install it like so:
sudo apt update
sudo apt install jq
LXD
LXD provides a unified user experience for managing system containers and virtual machines. And in this how-to, Juju will utilise LXD to spawn containers for the Livepatch on-premise services.
LXD can be installed locally via a snap. To install LXD, run:
sudo snap install lxd --channel=5.0/stable
Next, LXD must be initialised, run the following command and either accept the defaults or choose different options when prompted (you may also use the –auto flag):
lxd init --auto
Juju
Juju is an open source orchestration engine for software operators that enables the deployment, integration and lifecycle management of applications at any scale, on any infrastructure using charms.
Juju can be installed locally via a snap. To install Juju, run:
sudo snap install juju
Ubuntu Pro
Livepatch on-premise requires authorisation to the upstream hosted Livepatch by Canonical via the use of Ubuntu Pro tokens. To retrieve your Ubuntu Pro token please go here and save your token for later use.
Deployment Steps
1. Initialise Juju
Let us bootstrap a controller on LXD:
mkdir -p ~/.local/share
juju bootstrap lxd livepatch-onprem
After some time the controller should be ready.
Next, we’ll create a model to deploy Livepatch.
juju add-model livepatch
2. Deploying the bundle
Ensure you’re on the livepatch model:
juju switch livepatch
And deploy the bundle:
juju deploy canonical-livepatch-onprem --channel=machine
You can watch the status of the deployment:
juju status --watch 2s
After some time, your model will resemble the following:

You’ve successfully deployed Livepatch! But it requires a few more steps to get up and running.
3. Enabling Ubuntu Pro (Optional)
We will enable Ubuntu Pro on the machines for ESM (Expanded Security Maintenance).
Using your token from https://ubuntu.com/pro run:
juju config ubuntu-advantage token='<token>'
On a successful attach, you will see something similar to the follow in your status output:

If you are not using Ubuntu Pro, you can remove the ubuntu-advantage charm.
juju remove-application ubuntu-advantage
4. Enabling Livepatch
Next, to enable Livepatch on-prem, we’ll run:
juju run livepatch/0 enable token='<token>'
You will see the following action output if successful:
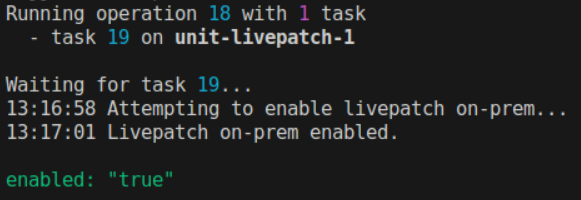
Livepatch is now enabled! In the next segment, we’ll configure the Livepatch server.
5. Configuring Livepatch
URL Template
We’ll need to configure a charm config option called server.url-template.
The URL template specifies the URL where patch files can be downloaded by Livepatch clients.
In an on-premise environment, this could be the server itself or any file server you have with patches ready to be served.
The URL template resembles the following:
http(s)://domain/{filename}
The {filename} segment is a special variable which Livepatch will insert file names as-is to.
Using an AWS S3 bucket is one option for patch storage.
To redirect clients for patch downloads your URL template may resemble
https://s3-eu-west-2.amazonaws.com/livepatch/patches/{filename}
For this tutorial, we’ll use the server itself to server patches. The Livepatch server has a special endpoint for serving patches at:
/v1/patches/:patch_name
To reach the server, we recommend going through HAProxy that is included in the bundl. HAProxy will act as a load-balancer, allowing you to scale the number of Livepatch server machines.
You may use a DNS pointing to your HAProxy or as we will do here to test your deployment, you can use an address from one of your HAProxy units. Run:
HAPROXY_ADDRESS=$(juju status --format json | jq -r '.applications.haproxy.units["haproxy/0"]["public-address"]') && echo $HAPROXY_ADDRESS
juju config livepatch server.url-template="http:/$HAPROXY_ADDRESS/v1/patches/{filename}"
You can confirm this was successful by running:
juju config livepatch server.url-template
Database Migration
For the final configuration step, we will trigger a database schema migration using a charm action:
juju run livepatch/0 schema-upgrade
The output will look like:

And Livepatch will enter a running state:

Note that the schema migration only needs to be run once. On future upgrades it will be run automatically.
The server is now ready to serve patches!
Authorisation and Authentication
In order to manage this Livepatch on-premise deployment we need to setup admin authentication. This can be done with the following steps.
Enable basic authentication:
juju config livepatch auth.basic.enabled=true
Install the following for bcrypt utilities:
sudo apt-get install apache2-utils -y
Next, create a user and password:
htpasswd -bnBC 10 admin admin123
admin:$2y$10$jEmTFsxm7dpqxptch8u3UuilVbzzmT6HGTeu6kKMta5Gdqnj9cOHG
Using the output verbatim, run (note the single quotes to escape special characters):
juju config livepatch auth.basic.users='admin:$2y$10$jEmTFsxm7dpqxptch8u3UuilVbzzmT6HGTeu6kKMta5Gdqnj9cOHG'
If you wish to add more users, this is a comma-separated list of user:passwords.
Now an administrator can login using the admin tool.
6. A brief introduction to the admin tool
Livepatch can be managed via our administrator tool.
You can download the admin tool via snap here.
To make things a little easier, we’ll create an alias to access the tool via livepatch-admin:
sudo snap alias canonical-livepatch-server-admin.livepatch-admin livepatch-admin
Next, we’ll export an environment variable called LIVEPATCH_URL. It must point at your DNS/HAProxy unit as discussed previously in this tutorial.
export LIVEPATCH_URL=http://$HAPROXY_ADDRESS
Now, with one of your administrators, you can login:
livepatch-admin login -a admin:admin123
The final step before attaching client machines to the server is to download patches from Canonical’s hosted Livepatch server.
Trigger a sync with:
livepatch-admin sync trigger --wait
For further information on the admin tool, see the Administration tool topic.
Additionally, see how-to configure patch sync filters to limit what patches you download.
Enabling machine status reporting
Each livepatch on-prem instance can optionally send information about the status of the machines it’s serving back to Canonical. Full details on what information is sent is available here
juju config livepatch patch-sync.send-machine-reports=true
This can be disabled at any time by setting the flag to false.
7. Cleaning up the deployment
Should you wish to clean up your deployment, you can do so via:
juju destroy-controller livepatch-onprem --destroy-all-models