After installing the Anbox Cloud Appliance, you must initialise it and register your Ubuntu SSO account with the dashboard.
Install requirements
The Anbox Cloud Appliance requires LXD >=5.0. Check which version you have currently installed:
lxd --version
If LXD is not installed, run:
snap install --channel=5.0/stable lxd
If LXD is already installed but the version is older than 5.0, run:
snap refresh --channel=5.0/stable lxd
Initialise the appliance
Invoke the initialisation process of the Anbox Cloud Appliance by entering the following command on your machine:
sudo anbox-cloud-appliance init
You will be asked a few questions. If you don’t want to make any specific changes, you can safely stay with the offered default answers.
Welcome to the Anbox Cloud Appliance!

The following questions will guide you through the initial setup of the
appliance. If you don't care about answering any of them you can just
accept the defaults.

For any further questions please have a look a the official Anbox Cloud
documentation at https://anbox-cloud.io/docs

Are you joining this node to an existing Anbox Cloud Appliance installation? (EXPERIMENTAL) [default=no]

Both the containers used to deploy the control plane services of the
Anbox Cloud Appliance and the ones used for the actual Android instances
require storage. Choosing an appropriate storage device and size will
affect both performance and density. By default each Android instance
will occupy 3GB of disk storage. Depending on the number of containers
you intend to run you should calculate:

storage size = 15 GB (for the OS) + 3GB * number of Android instances

Anbox Cloud uses ZFS under the hood for the LXD storage pool which
implements deduplication, so the actual space occupied later will be
less but may grow up to the maximum in some cases.

If you don't choose to use a dedicated block storage device the
appliance will allocate an on-disk image on the root disk of the
instance it's running on. You can influence the size of the image
by specifying a custom size.

If you don't specify a block device or a custom size, the appliance
will decide automatically on the location and best size for the LXD
storage pool.

Do you want to use a dedicated block storage device? [default=yes]
What is the path to the block storage device?  [default=/dev/nvme1n1]

Is the appliance deployed behind a NAT and should be available on a public address? [default=yes]
Do you have a DNS name you want to use instead of the IP address? [default=yes]
Which DNS name you want to use (e.g. anbox-cloud.io)?  [default=ec2-18-185-179-72.eu-central-1.compute.amazonaws.com]

Do you want to add support for monitoring? [default=yes]

Configuration completed. Do you want to initiate the bootstrap process now? [default=yes]

Everything configured, starting the bootstrap process now. You can
watch https://ec2-18-185-179-72.eu-central-1.compute.amazonaws.com for progress updates
When the command returns, the initialisation process will run fully automatically in the background. You can watch the status web page at https://your-machine-address for progress information.
Note: By default, the Anbox Cloud Appliance uses self-signed certificates, which might cause a security warning in your browser. Use the mechanism provided by your browser to proceed to the web page.
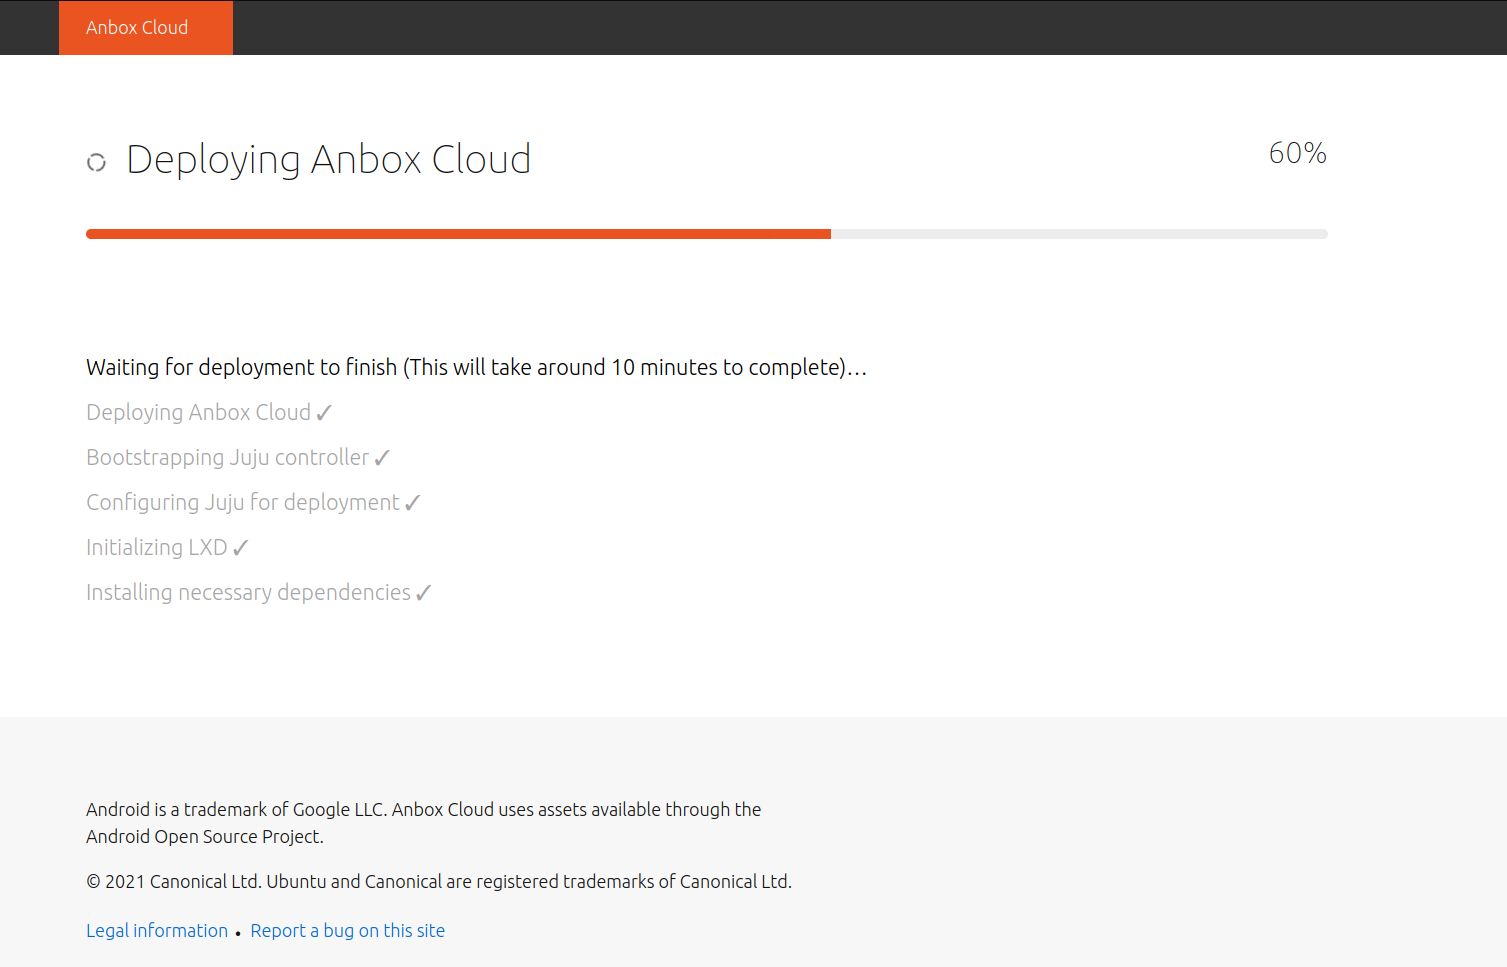
Alternatively, use the anbox-cloud-appliance status command to monitor the progress information on the command line.
status: initializing
progress: 60
update-available: false
reboot-needed: false
Register with the dashboard
Once the initialisation process has finished, you are presented with a welcome page on https://your-machine-address with instructions on how to register a user account with your installation. This registration is needed to access the web dashboard.
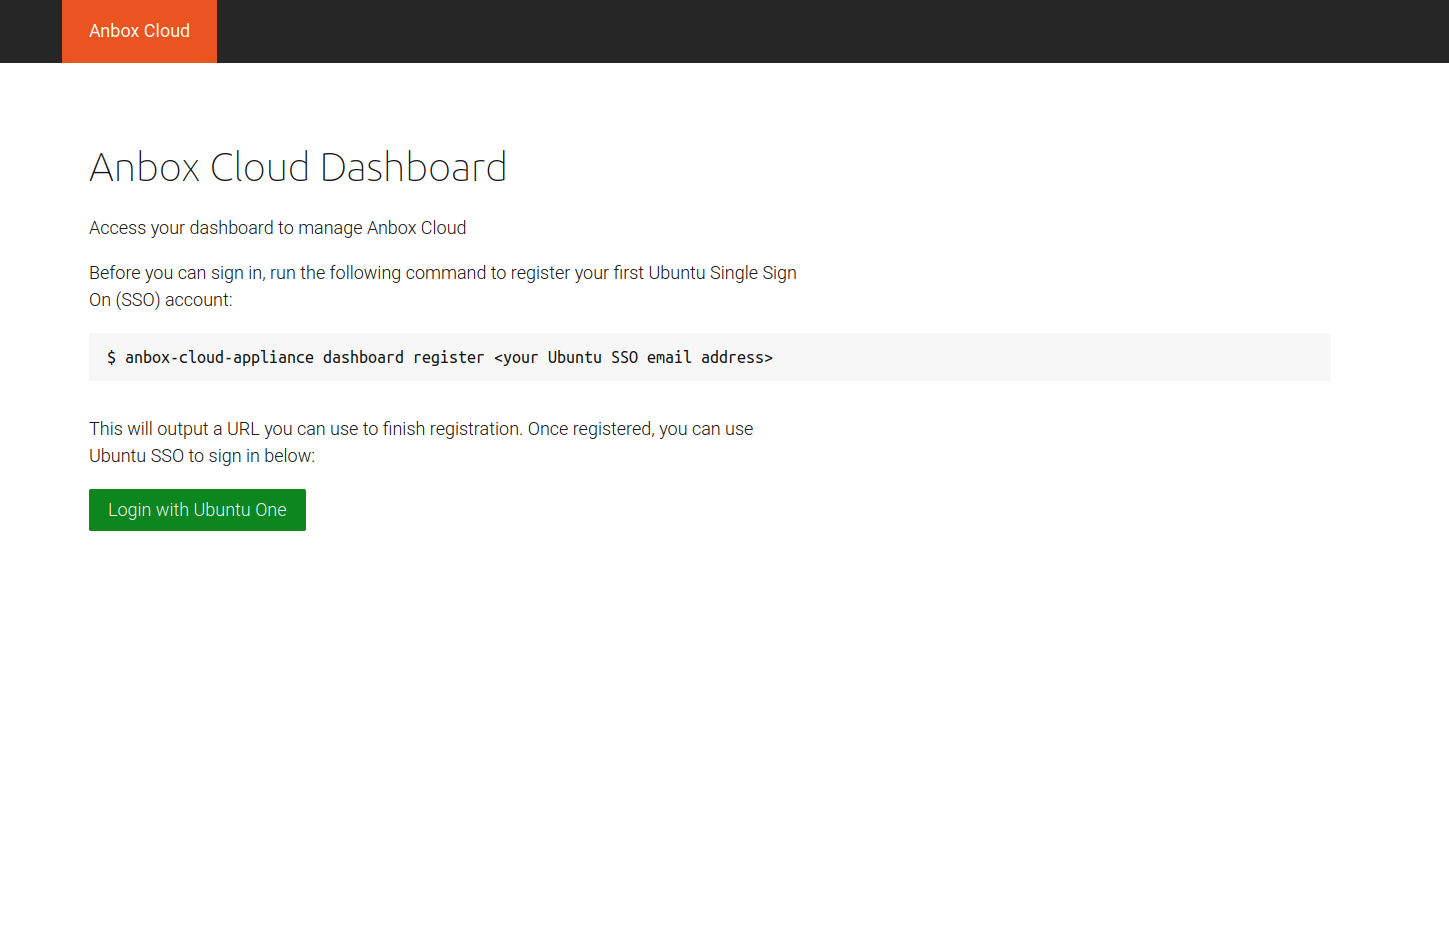
Register your Ubuntu SSO account by running the following command via SSH on the machine that hosts the appliance:
anbox-cloud-appliance dashboard register <your Ubuntu SSO email address>
The output provides a link that you must open in your web browser to finish the account creation. By default, the registration link expires after one hour. After registering, you can log into the appliance dashboard with your Ubuntu SSO account.