Distribute ROS applications with the Snap Store
In part 1 and part 2 of our developer guide series, we learned about what snaps can do for ROS applications by exploring the use of snap and snapcraft in complex robotics applications.
However, after the ROS application has been snapped, one might wonder:
- How can we distribute this package?
- How can we distribute updates?
- When can our devices or users benefit from the update?
In this developer guide, we will explore how to share and distribute our snapped robotics applications like a global software vendor.
This guide is meant for ROS snap beginners and advanced users looking for guidelines for their snap distribution.
What we will learn
Deploying robotics software is usually tackled when a project reaches a certain level of maturity. We need a fast and reliable way to distribute software and subsequent updates. Snapping a robotics stack is our means to distribute our software globally.
Snap and snapcraft contain many features that will come in handy when distributing our robot application. This guide will help us understand these features and how to use them.
In this guide, we will learn:
- How to upload our snap for the first time to the public store.
- How to update the snap and distribute the update.
- Ways for the final user or device to benefit from the updates.
Here are sections we can jump to directly:
- Creation of our snap
- Customise a snap so it can be unique.
- Register our snap
- Login from CLI with snapcraft.
- Register the unique name of our snap on the Snap Store.
- Upload and release our snap
- Upload our snap to the Snap Store.
- Release our snap.
- Download our snap
- Download and install our snap from the store.
- Update our snap
- Update the snap.
- Publish the update on the Snap Store.
- Get the update from the store.
While covering the theoretical aspects of distributing ROS snaps, we will apply all this knowledge to the ROS 2 Humble talker-listener example as a practical use case.
We will cover the use of the public Snap Store in this developer guide. Dedicated Snap Stores are also available under a commercial licence. They include all the features from the public Snap Store along with additional resources described in the dedicated Snap Store documentation.
Requirements
We will need basic ROS knowledge. Ideally, we will already understand how to build ROS packages, call a service, and know what a launch file is. We should also be familiar with the process of creating a map and using it to navigate.
A basic understanding of the Linux environment (Ubuntu) is also required.
Finally, we expect the reader to have a working knowledge of snaps. This means either previous experience with snap and snapcraft, or having followed the Deployment Guide - PART 1.
Setup
In terms of setup, we require a more minimal setup than we used in part 2.
We will need an up and running Ubuntu Desktop (20.04 being the minimum version, as it is still under maintenance). This tutorial cannot be followed inside a container or a headless environment.
On top of this OS we will need to:
Additionally, we will need an Ubuntu One account for the Snap Store. We will use this account to identify ourselves to the store.
As we’re building a strictly confined ROS 2 snap, we don’t need additional ROS 2, or any other, dependencies.
Globally distribute our first snap
In part 1 we covered the creation of a strictly confined ROS 2 Humble talker-listener snap. For this guide, we will reuse the same example.
Let’s recall what we did during part 1.
Creation of our snap
We will first download the work done in part 1. We will then adapt the snap to make it unique before finally testing our snap.
ROS 2 humble talker listener snap
To avoid repeating the work from the previous developer guide, we will clone the ROS 2 humble talker-listener snap repository:
git clone https://github.com/ubuntu-robotics/ros2-humble-talker-listener-snap.git -b confined
This repository mostly contains the file snap/snapcraft.yaml, which is the entry point to create the snap through Snapcraft.
This snap is using the demo_nodes_cpp package from the ROS 2 demo repository.
The snapcraft.yaml contains only one part called ros-demos that simply builds and installs the demo_nodes_cpp package. It also exposes one application called ros2-talker-listener that launches the ROS 2 talker-listener demo launch file.
Customise our snap
Every snap on the public Snap Store must have a unique name, which means the first step is to give our own snap a unique name.
For this guide, we will simply prefix our snap name by our pseudonym.
To do so, we will edit the snapcraft.yaml:
- name: ros2-talker-listener
+ name: yourname-test-ros2-snapstore
Now our snap will be unique, we can build it to make sure everything is working as expected.
Test our snap
The first step is to build the snap with the snapcraft command:
snapcraft
Even if the snap had been built previously, the new snap name will cause the build process to start again from the beginning.
Once the snap has been built, we will see:
Created snap package yourname-test-ros2-snapstore_0.1_amd64.snap
We can now install it from the generated file with the following command:
sudo snap install yourname-test-ros2-snapstore_0.1_amd64.snap --dangerous
And finally, we can test it by running the following command (replacing yourname with your pseudonym):
yourname-test-ros2-snapstore.ros2-talker-listener
Note that here we use <snap name>.<command> because the application and snap have different names (we could have assigned the snap name to the application to be able to omit the second part of the command).
We should now see the “Hello world” messages:
[talker-1] [INFO] [1696952444.819483634] [talker]: Publishing: 'Hello World: 1'
[listener-2] [INFO] [1696952444.820526860] [listener]: I heard: [Hello World: 1]
[talker-1] [INFO] [1696952445.819339673] [talker]: Publishing: 'Hello World: 2'
[listener-2] [INFO] [1696952445.819848321] [listener]: I heard: [Hello World: 2]
Now we have tested our local snap with our unique name, it is time to register our unique name on the public Snap Store.
Let’s remove the snap now, as we will now use the Snap Store:
sudo snap remove yourname-test-ros2-snapstore
If you had issues following any of the previous steps, please, review the developer guide part 1 again.
Register our snap
In order to upload our snap to the Snap Store, a developer account is required. This account is registered on Ubuntu One, which is a single sign-on service for Ubuntu and related projects. If you don’t already have an account, head over to https://snapcraft.io/account and select the “I don’t have an Ubuntu One account” option. More information on how to check your account ID and setup SSH keys can be found at Create a developer account | Snapcraft documentation.
CLI
Now that we have an account, we can proceed with the registration of our snap. First, we log in into our account via the CLI with the following command:
snapcraft login
Note that this must be run on the host and not in a container or a headless server.
We can find more information in the documentation about the snapcraft authentication.
If the login is successful, we can now register our snap as follows:
snapcraft register yourname-test-ros2-snapstore
The output will require us to agree that most users will expect our snap name to represent the snap we’re wanting to publish. Respond yes and then our snap will be correctly registered.
Web UI
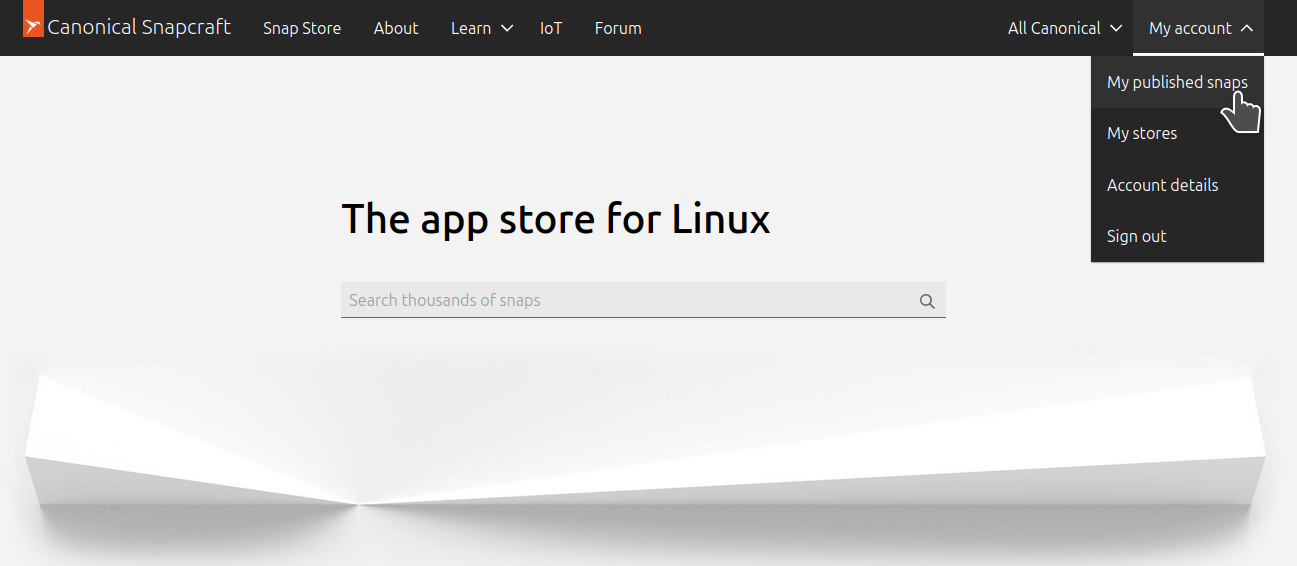
It is also possible to register a snap directly from the snapcraft.io website. To do so we can log into our developer account, select “My published snaps” in the account menu and then click “Register a snap name” on the top right of the page.
Upload and release our snap
After creating and registering our snap, the next step is to upload it on the Snap Store.
Once on the Snap Store, our snap can be exposed with public, private or unlisted visibility.
Upload on the Store
Let’s navigate to the folder in which our own built and tested snap is stored, and let’s upload it to the store with the following command:
snapcraft upload yourname-test-ros2-snapstore_0.1_amd64.snap
The upload process triggers a series of automated reviews to inspect our snap. The inspection includes a security and integrity check to assure that our snap will run. Our application will be available for installation after these reviews have completed without errors
However, while the snap has been uploaded, it is not yet released to the public. Let’s release it!
Release the snap
The release of a snap sets its track and the risk level. Channels are an important snap concept. They define which release of a snap is installed and tracked for updates. For example, they allow developers to:
- Distribute software with different ROS versions under the same name.
- Distribute an application on stable and edge. The stable channel promises reliability, while the edge channel contains the latest features.
- Distribute fixes or temporary experimentation using branches that after 30 days with no further updates, will close automatically.
By default, all snaps are pushed to the latest track, which is typically used to manage different versions of the same application. A good example of the track usage with ROS application would be to release each ROS distro on different tracks.
For more information on snap tracks and channels, please read the documentation.
For our application, we will use the default track (latest) and the stable risk-level.
To release our snap “yourname-test-ros2-snapstore” revision 1 on latest/stable we will use:
snapcraft release yourname-test-ros2-snapstore 1 latest/stable
Additionally, we could have combined the upload and the release with the following command:
snapcraft upload --release=latest/stable yourname-test-ros2-snapstore_0.1_amd64.snap
Once our snap has been uploaded on the Snap Store, we can switch an uploaded snap between different channels using either the command line or the Snap Store website UI, all the information on release management can be found at Release management | Snapcraft documentation.
Also note that the release process can be managed on the Snap Store UI on the releases tab.
We can now verify our snap is on the store by searching for it on https://snapcraft.io.
Since our snap won’t be useful to others, let’s change the visibility from public to unlisted. To do so, we must go to our snap list, select our snap. Then in the “Settings” tab, we can select “Unlisted”.
While we are doing all this process manually here, all of this can be integrated into a CI workflow. We can find more information in the ROS snap with GitHub Actions documentation.
Download our snap
Now that our snap has been uploaded and released, it can be installed from the Snap Store. To install our freshly released snap, run the following command:
sudo snap install yourname-test-ros2-snapstore
Notice how the --dangerous flag is no longer required. This change is a result of our snap being uploaded to the Store and undergoing the revision and signing process. With the snap now public and available in the Store, it becomes accessible to anyone worldwide!
The same command can be used on our robots, we can already start deploying our own snaps in our robotic fleet! If you want to create production grade images, we recommend using Ubuntu Core. For more information, please read the documentation about Creating Custom Images.
Update-our-snap
Once deployed, your application will need to be updated (e.g. to apply a fix, a new feature, a security patch). The Snap Store infrastructure can help you manage and deliver those updates to your devices, while we enjoy features like delta updates and over-the-air (OTA) updates.
Modify the snap
Let’s now modify our snap to see how updates work in more detail. This may require source-code changes and/or snapcraft.yaml changes.
For this example, we are going to use a different launch file for our talker listener.
The ROS 2 demo talker listener is also available via an XML launch file.
To simulate our update, we are going to replace the Python launch file with the XML one.
Change the launch file
To update the launch file that we use in our snap, we are going to change the file snap/snapcraft.yaml as follows:
name: ros2-talker-listener
-version: '0.1'
+version: '0.2'
[...]
apps:
  ros2-talker-listener:
-  command: opt/ros/humble/bin/ros2 launch demo_nodes_cpp talker_listener.launch.py
+  command: opt/ros/humble/bin/ros2 launch demo_nodes_cpp talker_listener.launch.xml
In addition to changing the launch file, we have also increased the snap version. This is not a snap requirement, but will be convenient for our users!
Now that we have modified our snapcraft.yaml we can rebuild it with the command:
snapcraft
A second snap file was generated this time and we can now distribute this update.
Upload the update
The freshly built snap file is called: yourname-test-ros2-snapstore_0.2_amd64.snap.
We can see in the name that the new version was used.
Let’s upload and release the update with the following command:
snapcraft upload --release=latest/stable yourname-test-ros2-snapstore_0.2_amd64.snap
By uploading the update and releasing it on latest/stable we have replaced the version that people will download when installing the application. This means that if anyone now instals our snap from the latest/stable they will get the version 0.2.
Get the update
With the new version of our snap now available on the Snap Store, we can probe the Snap Store to see both the version we have installed and the update:
$ snap info yourname-test-ros2-snapstore

name: yourname-test-ros2-snapstore
summary: ROS 2 Talker/Listener Example
publisher: –
store-url: https://snapcraft.io/yourname-test-ros2-snapstore
license: unset
description: |
    This example launches a ROS 2 talker and listener.
commands:
    - yourname-test-ros2-snapstore.ros2-talker-listener
snapd-id:  YNWjzdWUV1aNIXBMt1hOAToArNWqTsJX
tracking:  latest/stable
refresh-date: today at 15:39 CEST
channels:
    latest/stable:	0.2	2023-10-24	(2)	69MB -
    latest/candidate:	↑
    latest/beta:		↑
    latest/edge:		↑
    installed: 		0.1 		(1)	69MB -
As we can see in bold, we are tracking the latest/stable channel and have the version 0.1 installed. We can also see that the channel latest/stable now has the version 0.2 available.
Snapd hasn’t automatically updated our snap yet. By default, checks are automatically happening four times per day, with each check referred to as a “refresh.” The timing and frequency of these updates can be customised using the snap refresh command.
Therefore, we could simply wait for snapd to automatically update in the background, or we can force a refresh of our snap with:
sudo snap refresh yourname-test-ros2-snapstore
Our snap is now updated, and we can verify it with the snap info command.
To verify that our freshly updated snap works well, we can type:
yourname-test-ros2-snapstore.ros2-talker-listener
See Managing updates documentation to learn more about snap updates and how to monitor and manage them.
Conclusion
Our guide covered the basic steps required to release a robotics snap on the Snap Store. The final version of the snap can be found on the Snap Store. We didn’t cover features like air gap systems and proxies.
What we achieved
In this developer guide, we went through the first upload and release of a ROS snap. While covering the basics, we included links to more resources that explore the Snap Store topic in more depth in the Snapcraft documentation.
By uploading our first version and releasing it, we learnt that we can distribute our own application.
Similarly, we saw how to upload and distribute an update for our application, so our users and devices can benefit from it.
Make sure to check the official Snapcraft documentation to learn more about the Snap Store, the updates, the branches and much more!