| Key | Value |
|---|---|
| Summary | Get a local Kubernetes on Windows with Microk8s and Multipass. |
| Categories | containers |
| Difficulty | 1 |
| Author | Ammar Naqvi ammar.naqvi@canonical.com, Konstantinos Tsakalozos kos.tsakalozos@canonical.com |
Overview
What is Kubernetes
Kubernetes clusters host containerised applications in a reliable and scalable way. Having DevOps in mind, Kubernetes makes maintenance tasks such as upgrades dead simple.
What is MicroK8s
MicroK8s is a CNCF certified upstream Kubernetes deployment that runs entirely on your workstation or edge device. Being a snap it runs all Kubernetes services natively (i.e. no virtual machines) while packing the entire set of libraries and binaries needed. Installation is limited by how fast you can download a couple of hundred megabytes and the removal of MicroK8s leaves nothing behind.
In this tutorial you’ll learn how to…
- Install MicroK8s on Windows
- Operate your Kubernetes cluster
- Access the Kubernetes Dashboard
You will only need …
- A Windows 10 machine with at least 8 GB of RAM and 40 GB storage
- If you have Windows 10 Home edition, you will also need to install VirtualBox (Windows 10 Professional, Enterprise and Student editions include Hyper-v for virtualisation).
Installation
Duration: 5:00
MicroK8s has a Windows installer that will take care of setting up the software for you.
Download the latest installer here.

The installer checks if Hyper-V is available and switched on. If you don’t have Hyper-v (e.g. on Windows 10 Home edition) it is possible to use VirtualBox as an alternative.
Configuring MicroK8s
Duration: 2:00
You can now configure MicroK8s - the minimum recommendations are already filled in.
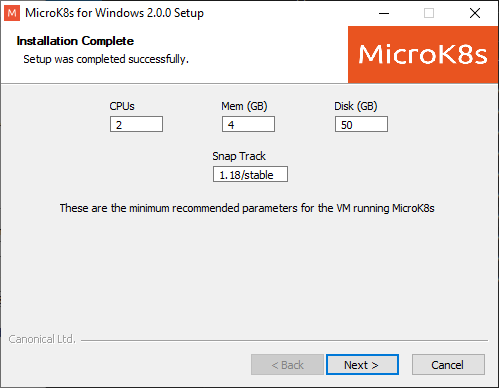
For information on changing the ‘Snap Track’, see the MicroK8s docs.
You can change this configuration at a later date by re-running the installer. Note that the Memory and Disk limits are initially set at the minimum values. If you are planning on running large workloads (e.g. kubeflow will require around 12GB RAM) you will want to set these higher.
Wait for MicroK8s to start
Duration: 2:00
Run PowerShell or cmd to get a command line.

Now you can check to see when MicroK8s is up and running:
microk8s status --wait-ready
Access Kubernetes
Duration: 2:00
MicroK8s bundles its own version of kubectl for accessing Kubernetes. Use it
to run commands to monitor and control your Kubernetes. For example, to view your node:
microk8s kubectl get nodes
…or to see the running services:
microk8s kubectl get services
Deploy an app
Duration: 3:00
Of course, Kubernetes is meant for deploying apps and services. You can use
the kubectl command to do that as with any Kuberenetes. Try
installing a demo app:
microk8s kubectl create deployment kubernetes-bootcamp --image=gcr.io/google-samples/kubernetes-bootcamp:v1
It may take a minute or two to install, but you can check the status:
microk8s kubectl get pods
Use add-ons
Duration: 2:00
MicroK8s uses the minimum of components for a pure, lightweight Kubernetes.
However, plenty of extra features are available with a few keystrokes using
“add-ons” – pre-packaged components that will provide extra capabilities
for your Kubernetes, from simple DNS management to machine learning with
Kubeflow!
To start it is recommended to add DNS management to facilitate communication
between services. For applications which need storage, the ‘storage’ add-on
provides directory space on the host. These are easy to set up:
microk8s enable dns
microk8s enable storage
Starting and Stopping MicroK8s
Duration: 1:00
MicroK8s will continue running until you decide to stop it. You can stop and
start MicroK8s with these simple commands:
microk8s stop
… will stop MicroK8s and its services. You can start again any time by running:
microk8s start
You can also just reinitialise your Kubernetes with microk8s reset.
Congratulations!
Duration: 1:00
You now have your own Kubernetes, ready to deploy apps or experiment with.
What next?
- Want to experiment with alpha releases of Kubernetes? See the documentation on setting channels.
- Need to tweak the Kubernetes configuration? Find out how to configure the Kubernetes services.
- Having problems? Check out our troubleshooting section.
- Love MicroK8s? Want to contribute or suggest a feature? Give us your feedback.