| Key | Value |
|---|---|
| Summary | How to install Adguard Home on a Raspberry Pi 2, 3 or 4, using an Ubuntu Appliance for automated updates. |
| Categories | iot |
| Difficulty | 2 |
| Author | Rhys Davies rhys.davies@canonical.com |
Overview
In this tutorial, we walk you through the process of installing the AdGuard Home Ubuntu Appliance on a Raspberry Pi, getting set up, and making the most of AdGuard Home. For instructions on Windows or macOS, or instructions for the Intel NUC or virtualisation you can follow the steps on our website.

What you’ll learn
- How to create an AdGuard Home Ubuntu Appliance
- How to set up AdGuard Home on your network
- How to start using AdGuard Home to shield your network
What you’ll need
- A microSD card (4GB minimum, 8GB recommended)
- A Raspberry Pi 2, 3 or 4
- A computer with a microSD card drive
- A micro-USB power cable (USB-C for the Pi 4)
- A monitor with an HDMI interface
- An HDMI cable for the Pi 3 and a MicroHDMI cable for the Pi 4
- A USB keyboard
Prepare an SD card
Warning
Following these steps will erase all existing content on the microSD card.
-
Download and install the Raspberry Pi Imager tool. Run:
sudo snap install rpi-imager -
Insert the microSD card into your computer
-
Run the Raspberry Pi Imager and select “CHOOSE OS”
-
Scroll down the menu until you see “Use Custom”. Click that option and select the download you made earlier.
-
Select the SDcard you have inserted, click WRITE and wait for the magic to happen. (This magic might take a few minutes)


Generate Secure Shell (SSH) keys
-
The ‘Secure Shell’ protocol provides access to your Ubuntu Appliance and uses cryptographic keys to authenticate you to the device. You need SSH software and keys.
-
To generate them run the following command in the terminal:
ssh-keygen -t rsa -
This starts the key generation process. When you execute this command, the ssh-keygen utility prompts you to indicate where to store the key
-
Press the
ENTERkey to accept the default location. The ssh-keygen utility prompts you for a passphrase -
Type in a passphrase
-
You now have a public and private key that you can use to authenticate.
Create an Ubuntu SSO account
-
Your Ubuntu Appliance will be added to your Ubuntu cloud account and use your SSH keys to identify you. Add your keys to your account at Cookies required by running the following command in your terminal:
cat ~/.ssh/id_rsa.pubCopy the result into the text field on the website. Click import and you will have the key set up.
Boot Ubuntu Core
Wait for the Raspberry Pi imager tool to complete. Remove the microSD card from your computer and insert it into your Raspberry Pi. Attach your monitor and keyboard to the Pi and connect it to your power source. If you want to use a wired network, connect your ethernet cable before booting too. Then, follow the instructions on screen.
- Press enter to configure
- Press okay to configure the network and setup an admin account
- If you are using ethernet you simply need to connect your ethernet cable and select done. If you are wanting to use a local wifi network select wlan0, where you can configure your wifi settings.
- Select done and the network config will progress.
- Enter the email address that is connected to your SSO account
SSH in
Your Pi will show an ssh command like:
ssh Ubuntu SSO user name@device IP address
Where your user name is your Ubuntu SSO username.
Get Going with AdGuard Home
Now you can go ahead and set everything up. It’s usually best to wait 5-10 minutes here. Some snaps will need to refresh themselves and the appliance may need to automatically reboot.
When you’re ready, go to:
http://IP-of-your-appliance:3000
in your computer’s browser. Where you will find the initial configuration wizard. Follow the instructions to start using your new Adguard Home Ubuntu Appliance.
On the configuration screen, under DNS Server, it will have an error in red:
listen udp 0.0.0.0:53: bind: address already in use.
Change the listen interface to Eth0.
Once you’ve finished the AdGuard configuration, you can connect to the admin panel by just going to http://ip_address (no longer port 3000), and can configure other devices on your network to use that ip address for the DNS server.
Using AdGuard Home
Now that you’re all set, it’s time to learn the basics. AdGuard Home offers you a rich framework to work with, and it’s up to you which way you’ll decide to go. To help you kick things off, here’s a quick rundown on AdGuard Home features.
This is your dashboard, the information hub that you can use to learn about all activities happening at AdGuard Home. You can’t do much directly from this screen, only see the general picture, but it’s a good starting point to move on to other settings.

All changes you make here will be automatically applied to all devices connected to AdGuard Home, unless specified otherwise.

AdGuard Home is a blocking DNS server at its core, and this is the place to configure everything DNS-related: upstreams, bootstraps, cache, access settings etc.

You’ll find this useful if you want your admin interface to work via HTTPS and your DNS server to listen for requests over DNS-over-HTTPS and DNS-over-TLS.
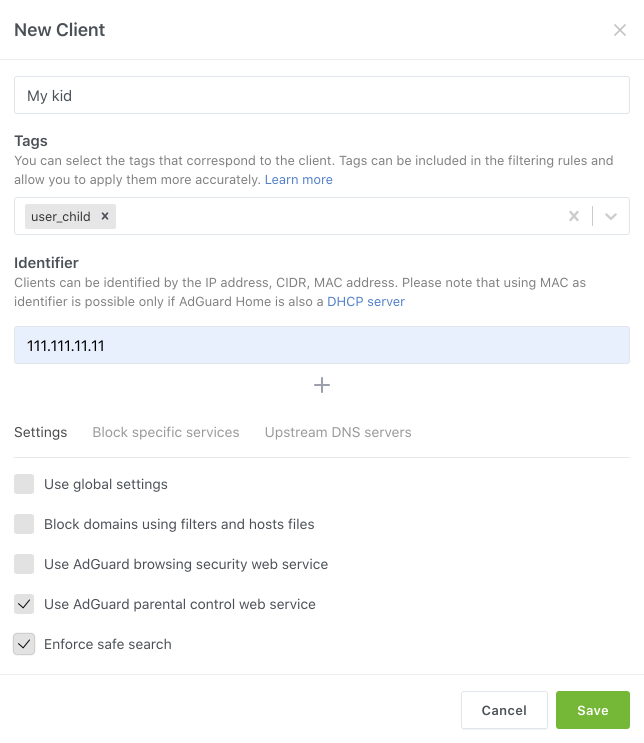
Here you can add your devices as clients (by IP, MAC address or CIDR) and set specific permissions for them. For example, disable TikTok for your work laptop or enforce safe search for your kids’ tablets.

On DHCP settings tab you can setup AdGuard Home as your own built-in DHCP server. This makes configuring the Clients much easier as it allows to distinguish them by their MAC addresses.

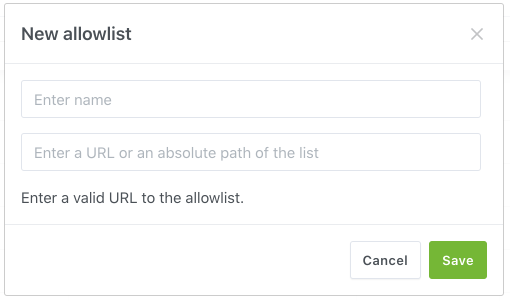
Add DNS blocking lists to block access to ad, tracking and malware domains. AdGuard supports basic adblock rules or hosts files syntax. Lists added to “DNS allowlists” section will unblock domains instead.
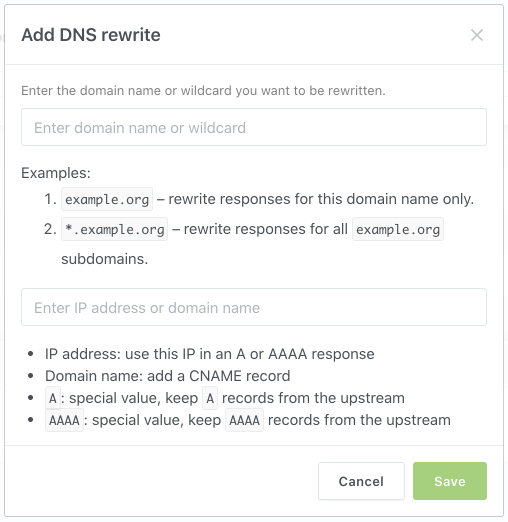
“Rewrites” tab allows you to redirect specific DNS requests (say, requests to example.org and its subdomains) to a specific domain or IP address.

One-click way to block access to some of the popular services like Facebook or Twitter. Note that these changes will be applied to all clients by default.

Custom filtering rules. This is the place to fine-tune your filtering. Custom rules support the same syntax as DNS blocklists but can be added individually and not as a part of a larger list.

Query log contains detailed information on all processed DNS requests inside your network. For known trackers AdGuard Home will display additional details.