
| Key | Value |
|---|---|
| Summary | In this tutorial, you will learn how to use AKS spot instances with Kubeflow Pipelines. |
| Categories | cloud, containers |
| Difficulty | 3 |
| Author | Bartłomiej Poniecki-Klotz bartlomiej.ponieckiklotz@canonical.com |
Overview
Duration: 30:00
Charmed Kubeflow is an MLOps platform from Canonical, designed to improve the lives of data engineers and data scientists by delivering an end-to-end solution for AM/ML model ideation, training, release and maintenance, from concept to production. Charmed Kubeflow includes Kubeflow Pipelines, an engine for orchestrating MLOps workflows, such as feature engineering, deep learning model training experiments and release of model artifacts to production scoring servers.
What you’ll learn:
- How to add Azure Spot Instances to the AKS cluster
- How to create Kubeflow Pipelines running on spot instances
- How to gracefully handle spot instances eviction
What you’ll need:
- A Charmed Kubeflow deployed on an AKS cluster - see the install guide to get up and running
- Access to the AKS cluster using
kubectl - Some command-line knowledge
Spot instances
The Spot instance feature is a cost-saving way of running virtual machines in the cloud. It is offered by cloud providers like Azure using their spare capacity. If they are the same as on-demand instances but a lot cheaper, everyone should always use them, right?! When this compute capacity is needed by cloud providers, they can evict the user workload. A new instance can be provided, but the workload will be interrupted. Based on the instance type this happens between 1% to 20% of the time.
Spot instance prices change based on the amount of spare capacity that is available for a given instance type. When a lot of people request the same instance type, the cost of a spot instance can be equal to the on-demand price in a region. However, there is a way to define the maximum price we want to pay – when this value is exceeded, the spot instance will be evicted.
In the MLOps Workflows
Based on the above features, MLOps workflows are workloads that are not time-sensitive and will not be impacted by eviction. Additionally, spot instances can be used for short tests and experiments where stability is less important than cost.
In ML Workflows, there are a few good candidates for running on spot instances:
- Data processing
- Distributed training and hyperparameter tuning
- Model training (with checkpointing if it takes a long time)
- Batch inference
It is not recommended to use spot instances for:
- Kubernetes control plane
- Notebooks and dashboards
- Datastores like Minio or databases
- Model serving for online inference
AKS cluster changes
You need a working Kubeflow deployed on AKS to follow the implementation.
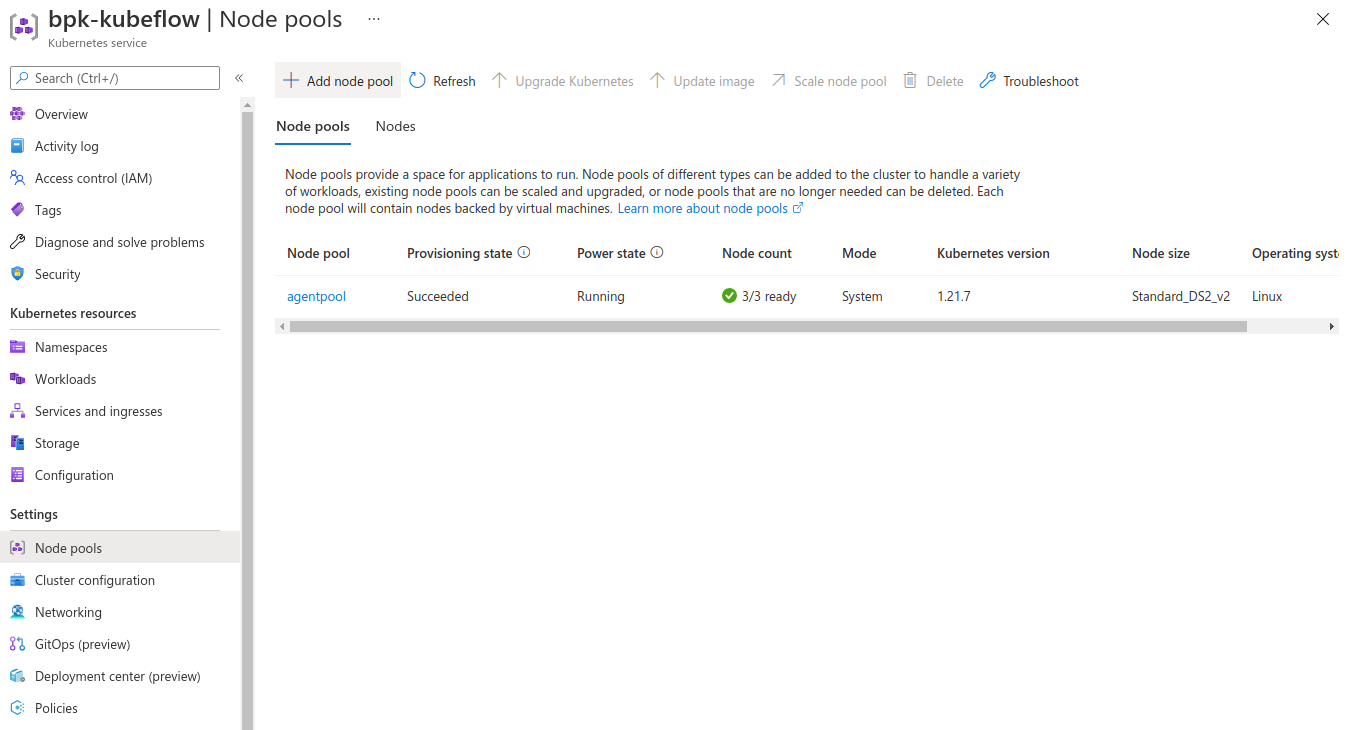
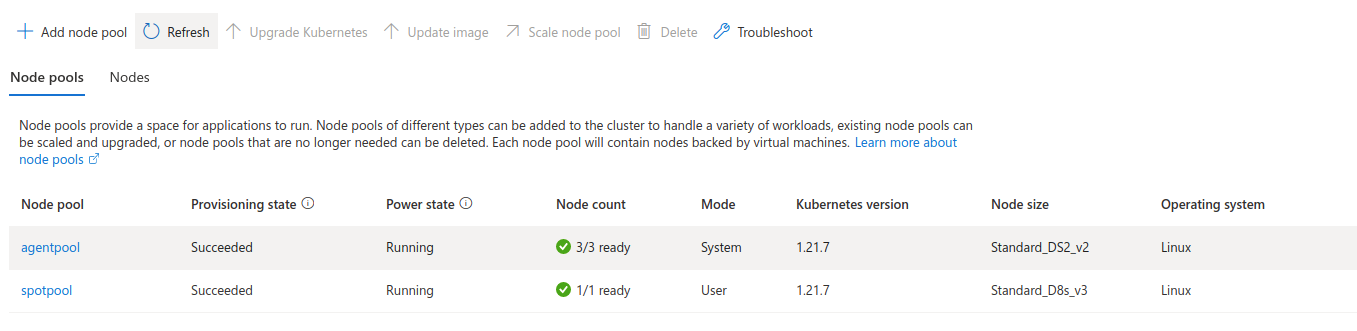
In the cluster, details screen go to Settings -> Node pools. We have only a single agent pool that hosts Juju and the Charmed Kubeflow pods. We want to add an additional node pool that will contain the spot instances. The spot instances will then be configured so that no applications can be accidentally placed there.
Select the “Add node pool”. Select the “Enable Azure Spot instances” to use spot instances instead of on-demand.
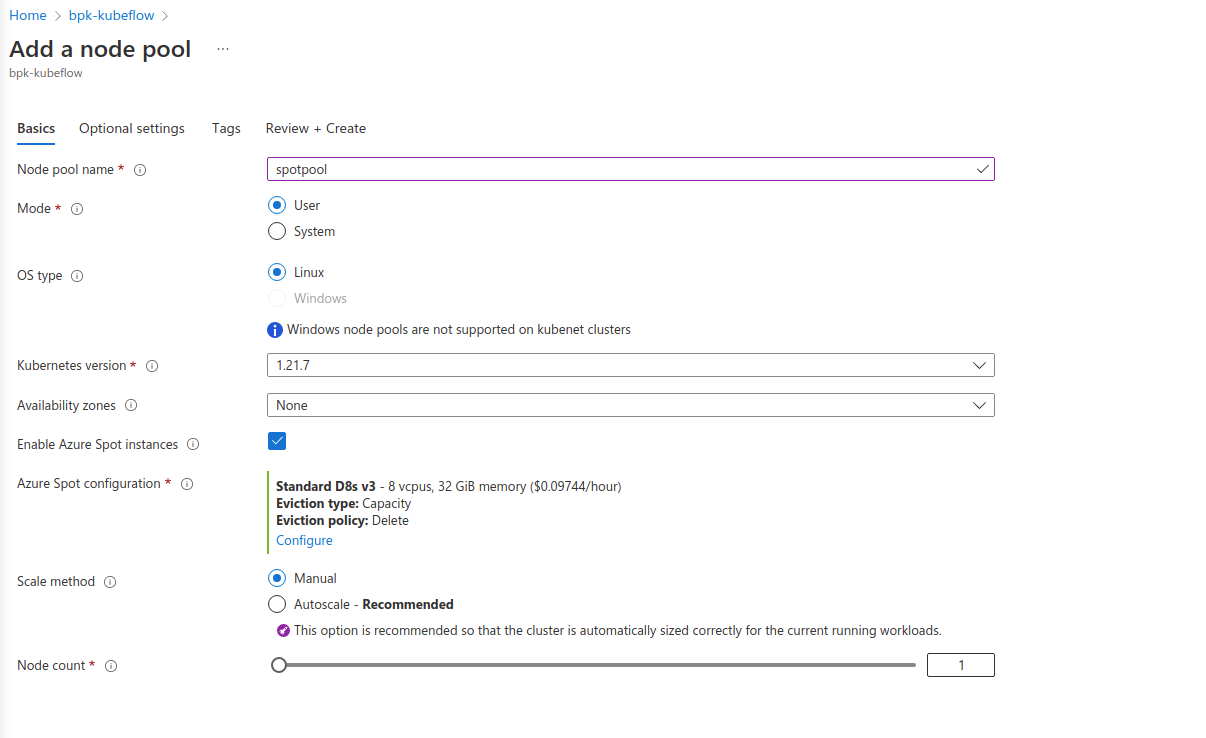
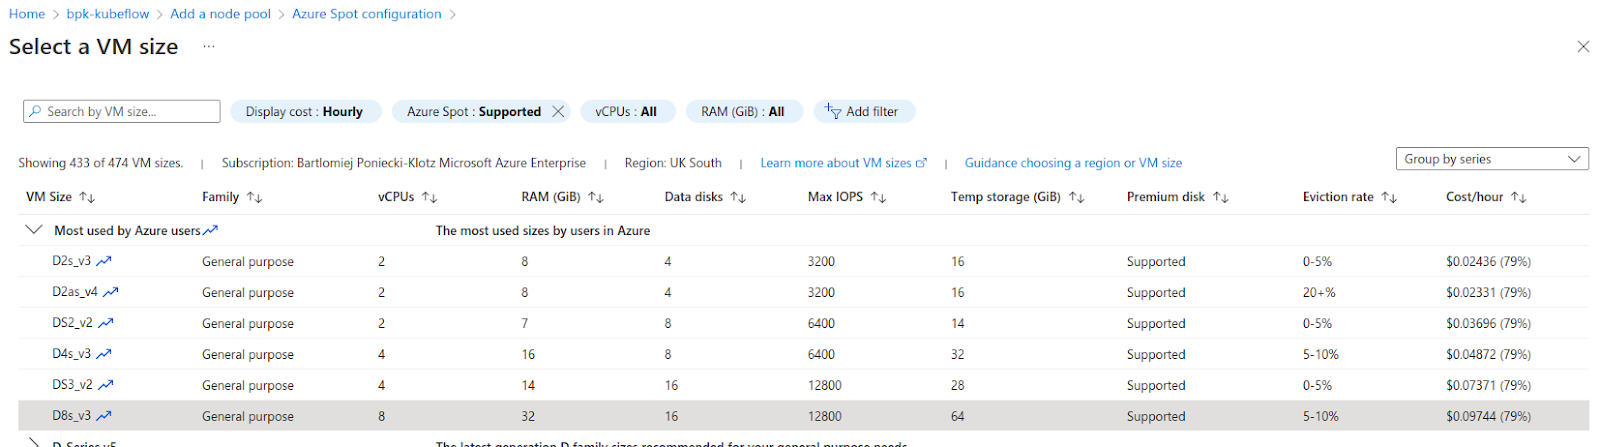
Azure Spot configuration is important because there you specify when your nodes will be evicted and how (“Eviction type” and “Eviction policy” respectively). If your workload has a maximum price over which it is not worth running it - you can put it here.

After completing all required fields, go ahead and create the pool. It will take some time for VMs to start up. You can check if all the nodes are available in the Azure portal’s “Node pools” tab or using kubectl get nodes

Workflow with on-demand instances
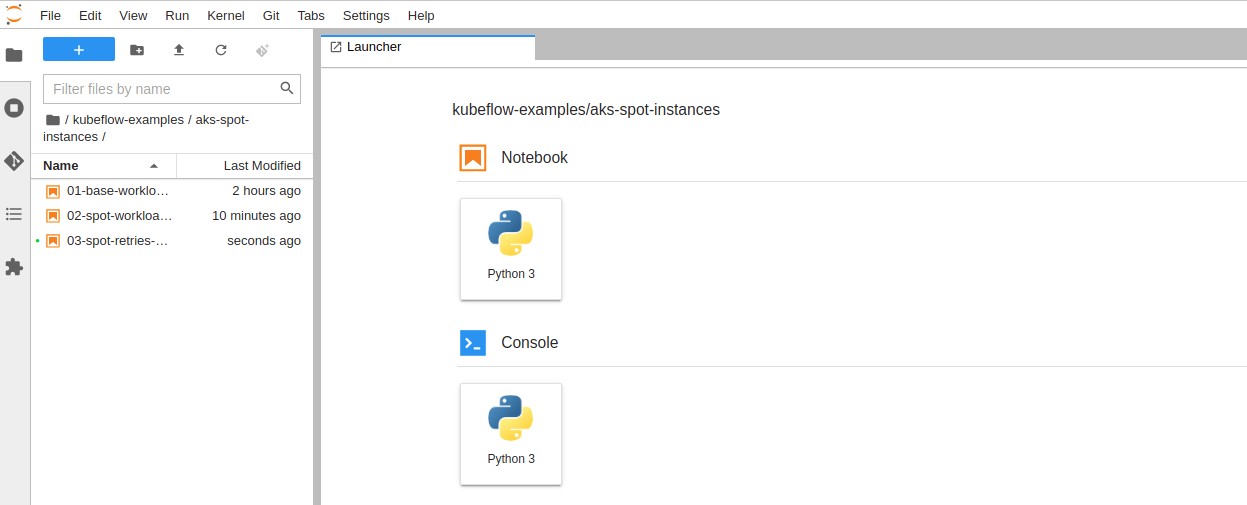
Create a new notebook in the Kubeflow notebooks and clone the repository from: https://github.com/Barteus/kubeflow-examples. Notebooks for this tutorial are in the aks-spot-instance folder. You can follow along or run the notebooks from the folder. They are numbered for easier following.
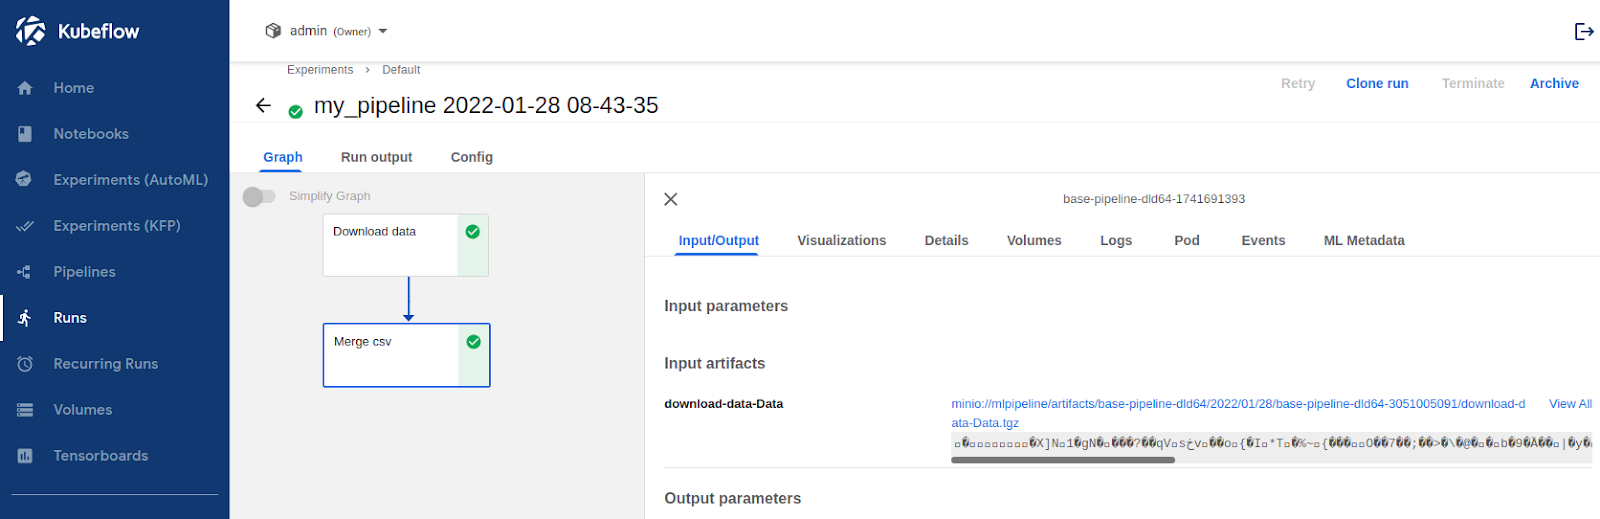
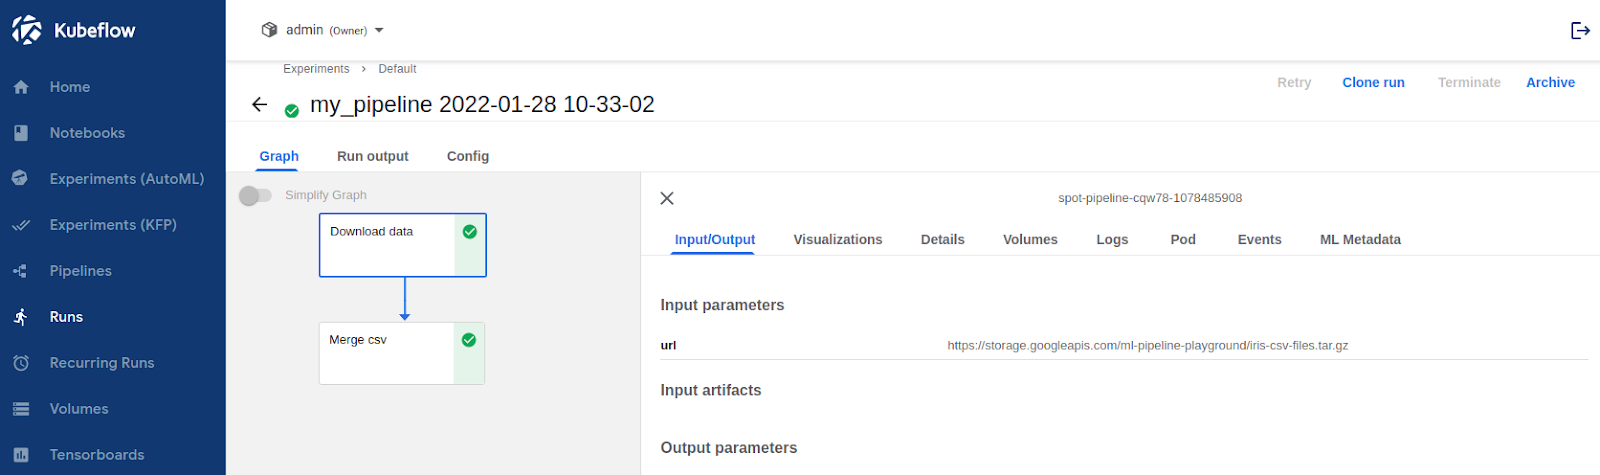
For the first run don’t change anything. Let’s see default Kubeflow Pipelines behaviour. To see the Workflow Run details click on the “Run details” link in the Kubeflow Dashboard and the Kubeflow Pipelines UI will be shown.
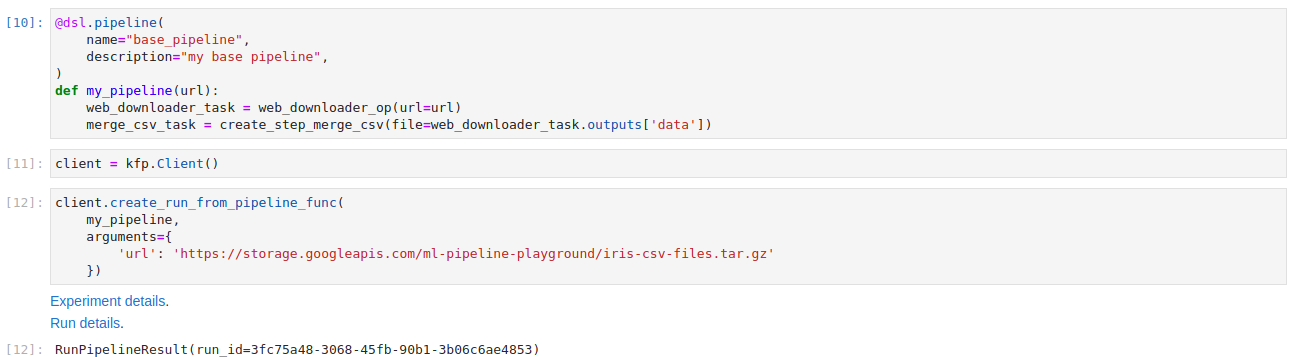
The workflow was executed correctly. It downloaded the tgz file, unpacked it and concatenated all of the csv files in the package. As expected the interim results are stored in Minio. Logs from the pods and the general state of the Run can be checked in the Kubeflow Pipelines UI. Finding which node the task Pod was executed on can be done by searching through the long Pod definition yaml - under the field “nodeName”.
To check where workflow steps were executed use kubectl get pods -n admin -o wide. In the Node column, we can see that all tasks were executed on agentpool. This is expected because we did not allow our tasks to be executed on our spot instances pool.
Workflow with spot instances
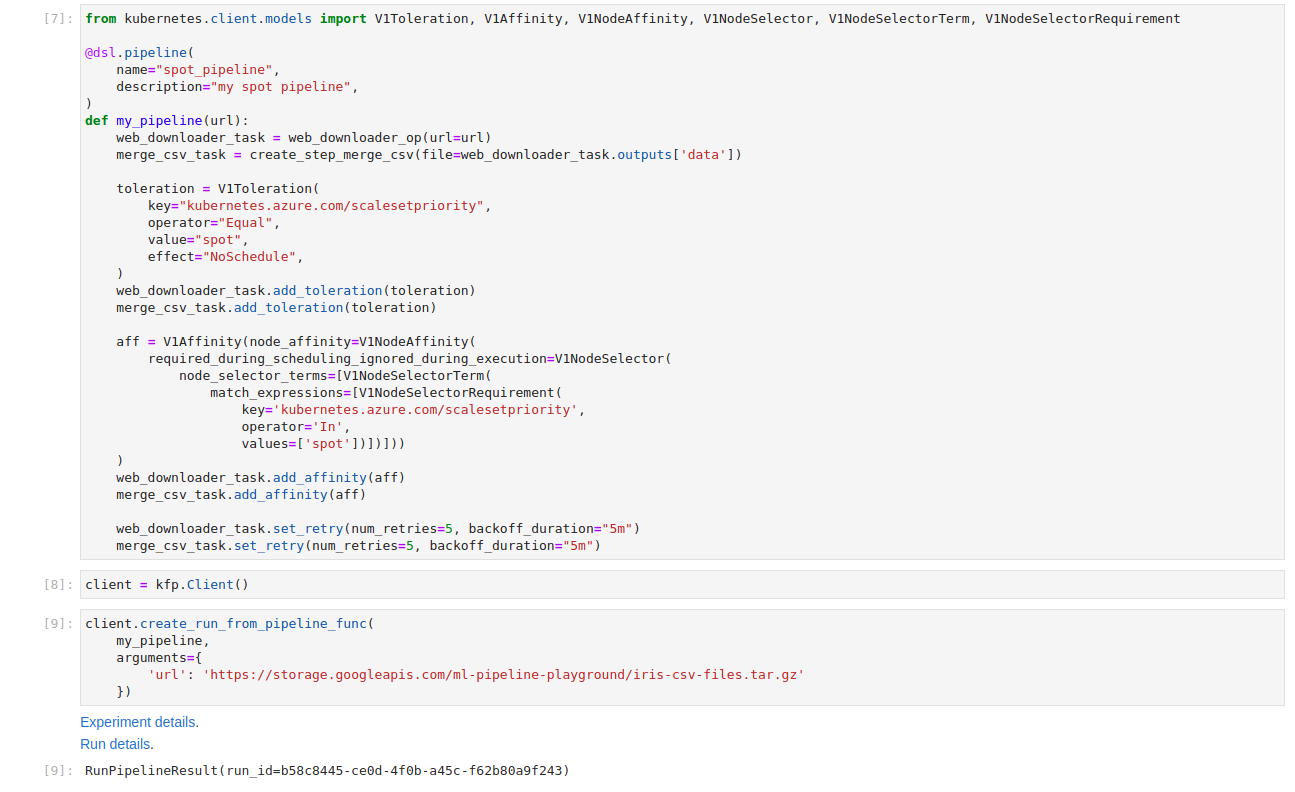
We want to allow task execution on spot instances. The Kubernetes Toleration mechanism will help with this. By adding proper Toleration to each of the tasks they now will have the ability to be executed on spot instances. We can leave the rest to the scheduler and in most cases, all tasks will be run on spot instances, but we will not have full assurance of that. If we have tasks that must run on a certain type of node (like GPU size required), we need an additional Affinity configuration to enforce which type of pods could be used to execute the tasks.
The changes will be done only at the pipeline level. Tasks are completely unaware of enforced Kubernetes configuration details. We modified the previous my_pipeline method with both Toleration and Affinity. Each configuration is set up per task. This gives us some flexibility to run tasks on the most cost-effective node.

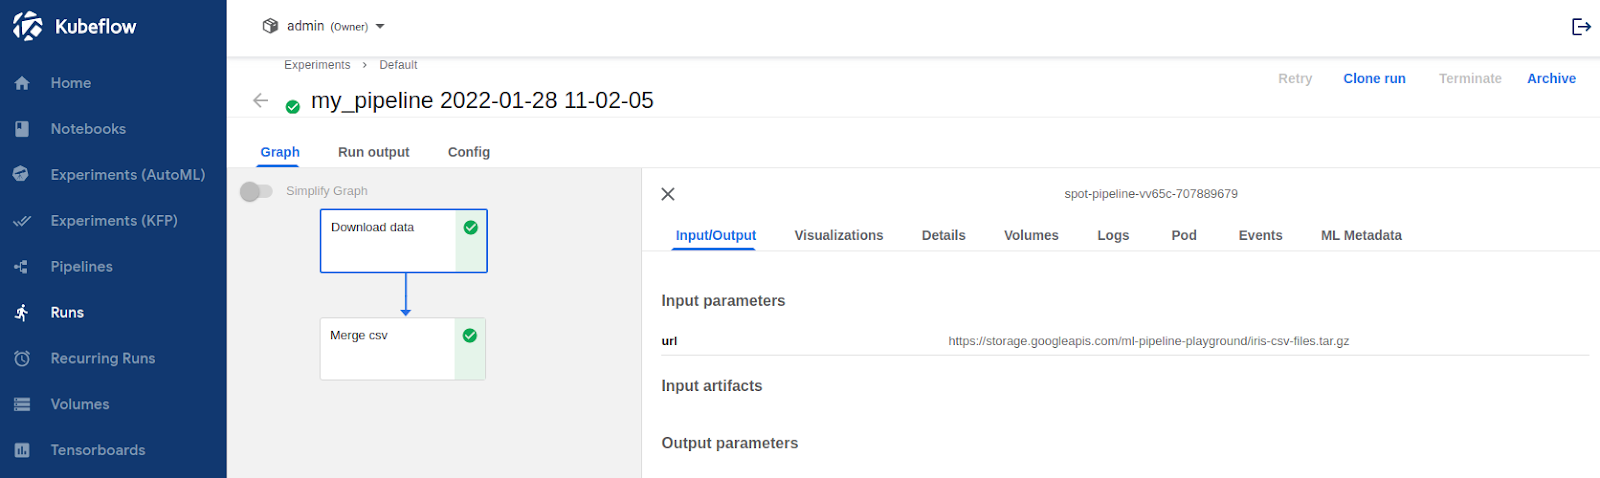
After changes our pipeline works perfectly fine, doing exactly the same thing. The change can be seen in the Pod definition – in the “nodeName” field.
Let’s check on which node the spot-pipeline was executed. We can use the command kubectl get pods -n admin -o wide | grep "spot-pipeline". As expected, Affinity and Tolerance worked, both tasks were executed on spot instances.
Graceful Eviction handling
We have a working solution that uses the spot instance to efficiently process data in Kubeflow Pipelines. There is one more thing we need to remember about spot instances, which is Eviction. At any point of time a node VM can be evicted – and we will need to be able to handle this gracefully. Kubeflow Pipelines has a function called retries which comes to the rescue here. We can set the retry policy for each of the tasks that will be executed on a spot instance. When a spot instance gets terminated and the task fails, Kubeflow Pipelines will wait and then retry the task – it’ll keep doing this until the max retries count is reached.
We have set our tasks to retry up to 5 times and with 5 minutes between attempts to give time for the new node to spawn.
Again the workflow runs perfectly fine. If a spot instance is evicted during the task run, it will retry again in 5 minutes.
Adding retries to your Kubeflow Pipeline definition will save you from “random” errors in execution, especially for instance types with an eviction rate >20%.
That’s all folks!
We walked through the process of adding a new spot instance pool to the AKS cluster, configuring the Kubeflow Pipelines workflow to use spot instances and handle eviction properly.
There are a few things worth emphasizing :
- Spot instances are a cost-effective way of running not time-sensitive workflows in MLOps workflow
- Spot instances can be evicted at any point in time and workflows needs to handle this gracefully
- Jupyter notebooks and datastores should not be placed on spot instances
- Model training, Data preprocessing and batch inferences are great candidates for spot instance utilization
The demo workflow we used is based on https://www.kubeflow.org/docs/components/pipelines/sdk/build-pipeline/
Further reading
- For more information in-depth documentation check - Charmed Kubeflow